Login
Log in if you have an account
Register
By creating an account with our store, you will be able to move through the checkout process faster, store multiple addresses, view and track your orders in your account, and more.
Create an accountRepair a tire puncture

Being a knowledgeable cyclist is about more than just pedaling. It also means knowing how to maintain and repair a puncture on your bike if necessary, and ensuring that each ride is safe.
Register for one of our workshops on repairing punctures and maintaining your bike here: https://bit.ly/4aqNO3e.
Places are limited to 8 people per group. If no time slot is available, contact us to find out our next availability.
THE ESSENTIALS TO BRING TO REPAIR A PUNCTURE
Whether you are on a leisure ride with a hybrid bike or a more sporty outing on a road bike or in the mountains, it is essential to have the necessary tools to repair a puncture. Even with tubeless tires, a puncture can occur! The essentials to have with you remain the same, whether you have an inner tube or not.
We'll cover the basic items you should always carry with you to be prepared in case of a flat tire on the road, to avoid having to call for an Uber.
1. THE EMERGENCY BAG
Whether it's a saddle, handlebar or frame bag, make sure you have space to store the essentials on your rides.
Discover our bag options.
More and more carbon bikes now offer space dedicated to storing your first aid kit directly integrated into the frame.
2. MINI TRANSPORT PUMP AND/OR CO2 CARTRIDGES
To repair a puncture, air is essential! We recommend having both a mini transport pump and CO2 cartridges. The mini pump attaches easily to the bike frame and is handy for lightly inflating the inner tube before replacing the tire, while the CO2 is faster. Note, however, that it is difficult to accurately measure pressure with CO2 cartridges and they are single-use, so they can be wasted if misused.
3. ONE OR TWO AIR CHAMBERS
Even if you use tubeless tires, an inner tube can be very useful. If your tire or tubeless tape has a hole or crack, the inner tube will block the hole so you can get home. Having a backup tube is good, but having two is even better.
4. PATCHES
Patches can be very useful for repairing a punctured inner tube or tire. If the perforation is minor and you have good quality patches, you will be able to drive a few extra kilometers. However, remember to change your inner tube as soon as you get the chance.
5. TIRE LEVERS
Tire levers are important allies for easily and quickly removing a tire from its rim. If the tire fits well, a second tire lever can be very useful to create additional space.
REPAIR YOUR PUNCTURE IN STEPS
STEP 1: PREPARE YOUR BIKE
- Position yourself in a secure location where motorists will see you from a distance. If there is any air left in your tires, remove it.
- Turn your bike upside down, saddle on the ground, wheels facing the sky. If your puncture is on the rear wheel, shift to the lowest gears (small and large chainring) to make the operation easier. You can also press lightly on the derailleur to release the wheel.
STEP 2: REMOVE THE WHEEL
- On bikes with a quick release axle, unscrew or loosen the nut on the other side of the quick axle lever. Turn it counterclockwise until it is completely unscrewed, then remove it. With the axle released, gently pull the wheel out of the frame or fork.
- Caliper brake: Release the brake lever so the pads move apart and the wheel can be removed easily.
- Disc brake: Do not touch the brake handles!
If your bike has other features (e.g. an electric bike), do not hesitate to make an appointment with our workshop for a 101 course on how to remove your wheels.
STEP 3: INSPECT AND REMOVE TIRE AND TUBE
- Do a quick inspection to try to find the source of your puncture. If you have a patch kit, a minor puncture can be repaired.
- Completely deflate your inner tube. Use your tire iron to slide it between your tire and your rim and slide it all the way around your wheel. If your tire is tight, use a second tire iron to create more space. Pulling lightly on the valve, remove the inner tube.
STEP 4: INSTALLING THE NEW AIR CHAMBER
- Inflate the inner tube to approximately 50% to facilitate installation. This will prevent your inner tube from twisting or getting stuck between the tire and the rim.
- Pass the valve through the hole in the rim. Starting at the valve, slide the inner tube into the tire. Then, place the tire back into the rim. The last few centimeters can be a little more difficult. With the wheel pressed against your legs, press each side of the wheel up and down with your palms.
- Before moving on to the next step, do a quick inspection to make sure the tire is seated properly on both sides.
- Inflate to the recommended pressure (written on the tire) and the wheel is ready for installation.
STEP 5: REFIT THE WHEEL
The hardest part is now behind you. All you have to do is install your wheel. If you have released your brake lever, don't forget to put it back. We recommend that you test your bike and brakes gently before setting off again.
BACK AT HOME
Back home, analyze the condition of your tire, your old inner tube or your tubeless tape to try to find the source of the puncture if you haven't already done so.
Generally, a puncture can be caused by:
- A perforation (e.g. a nail, a piece of glass, a spoke or other).
- The inner tube pinched between the tire and the rim.
- Wear of the tire, valve, rim tape.
Also be sure to put one or two new inner tubes back in your first aid kit.
If in doubt, come see us in store!
Recent articles
View all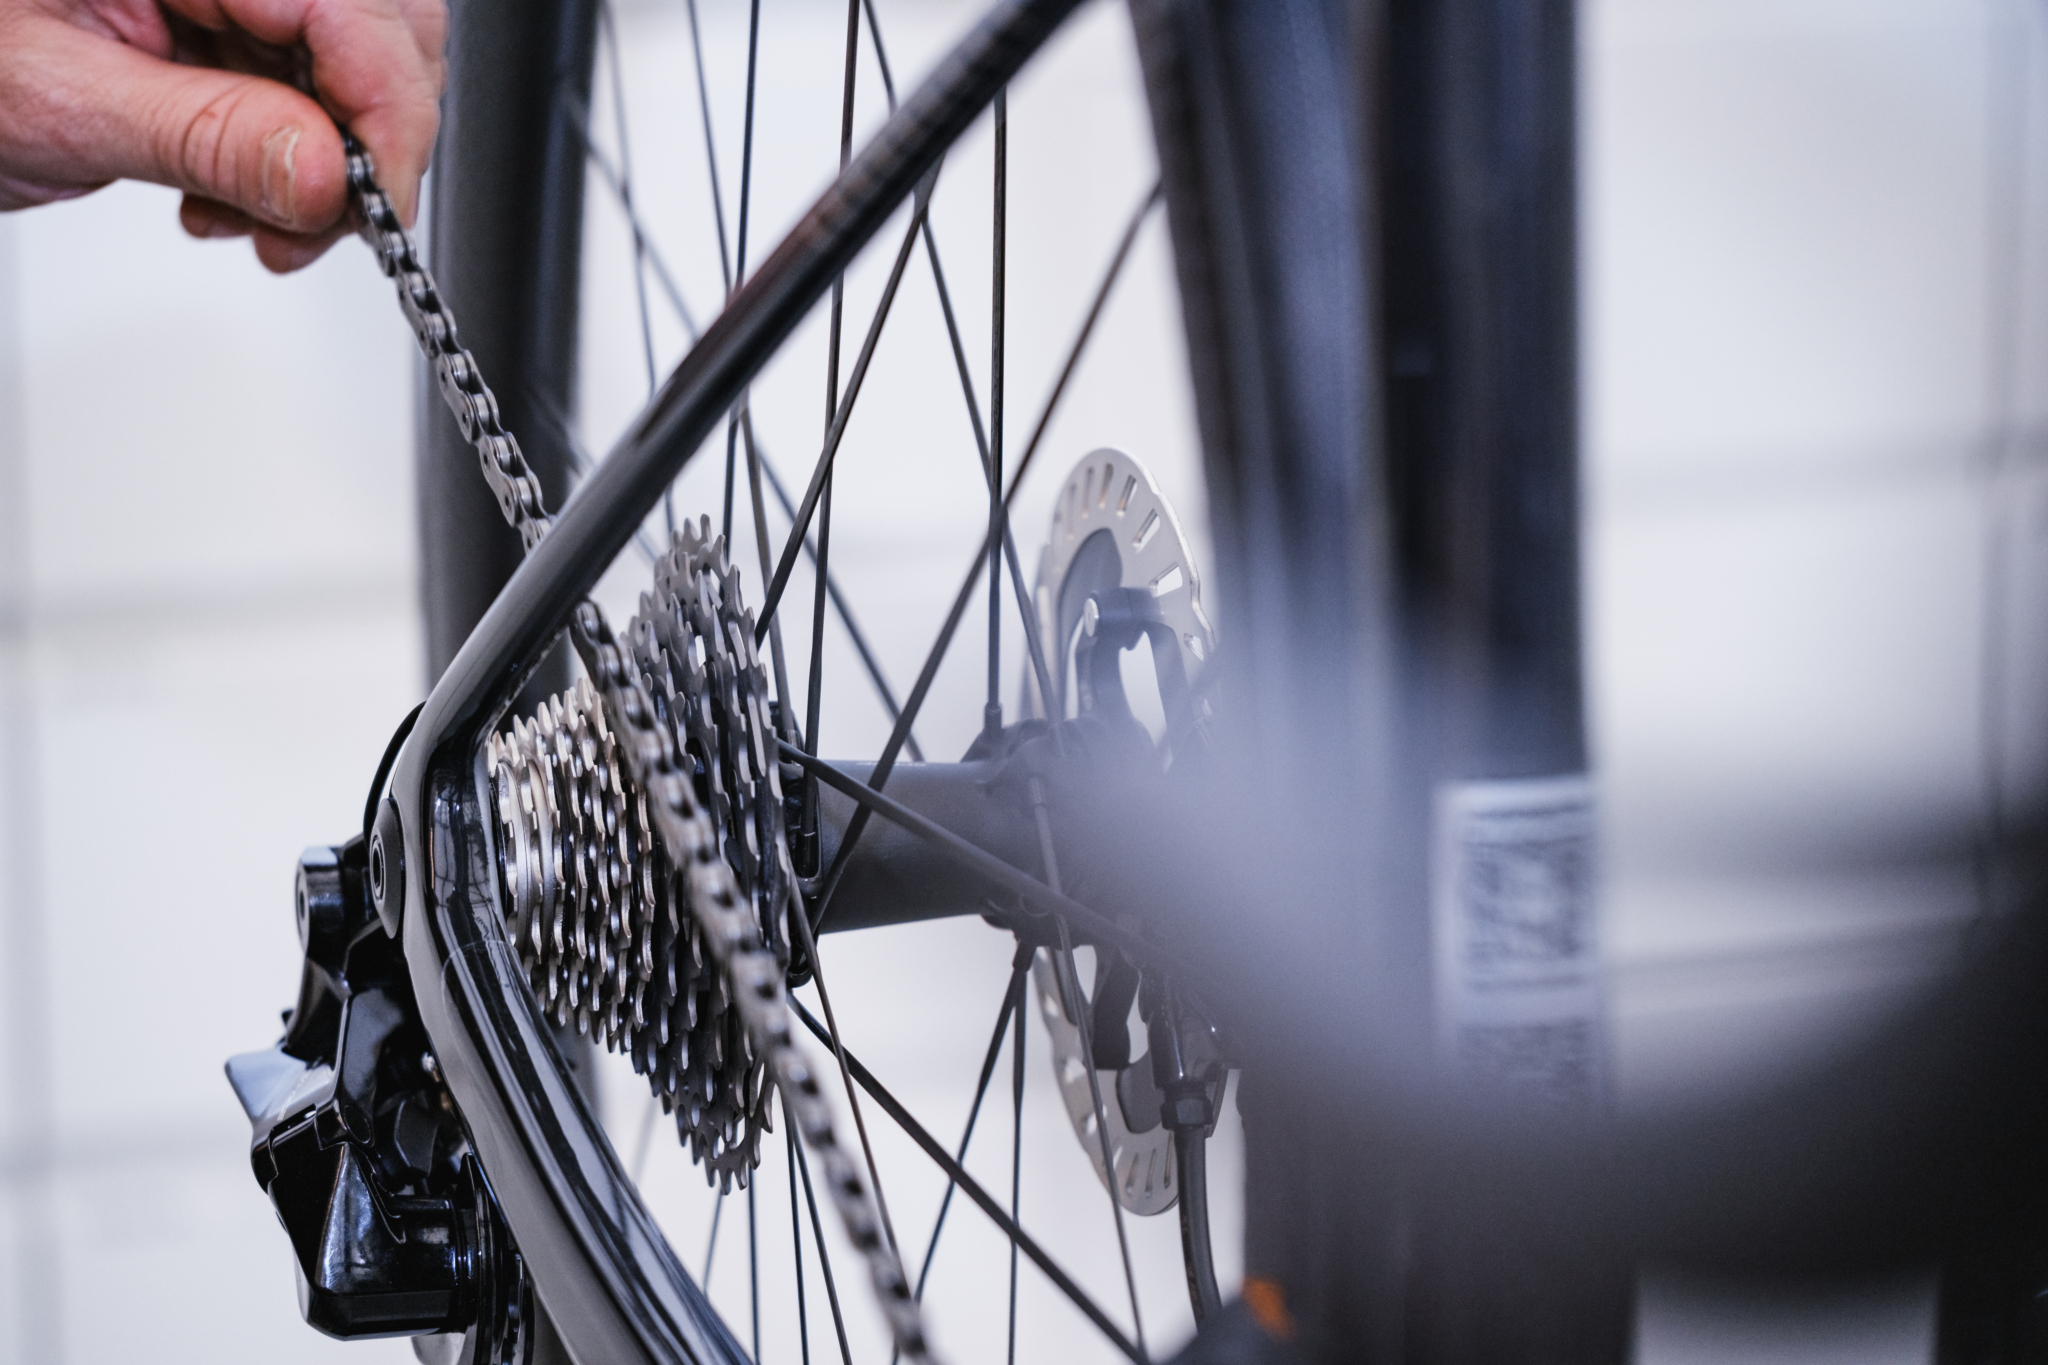
Prepare Your Bike for Spring

New partnership with Trek Travel: Cycling adventure awaits!